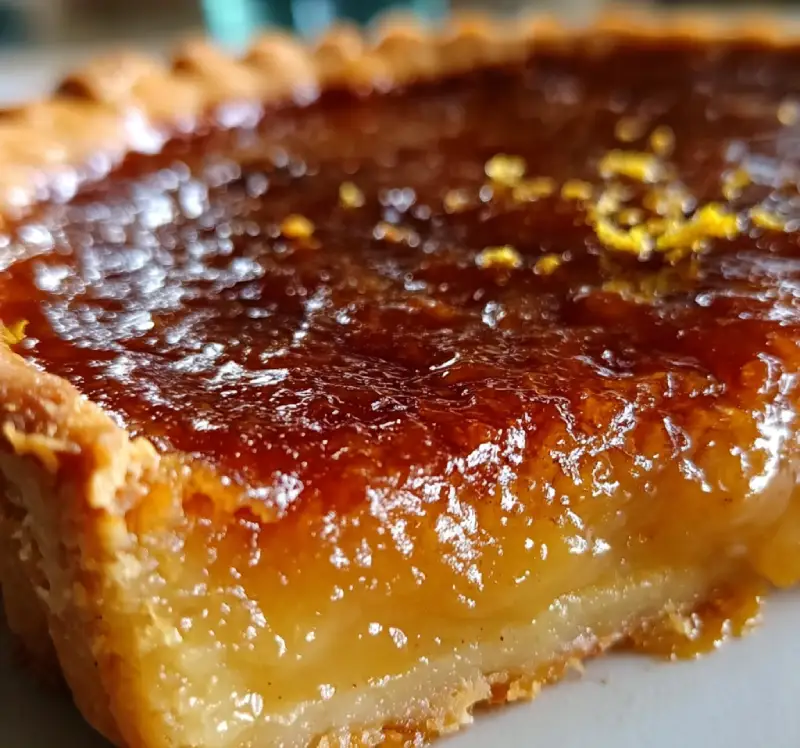
Introduction to Burnt Honey Pie
As a busy mom, I know how precious time can be, especially when it comes to whipping up something sweet. That’s why I fell in love with Burnt Honey Pie. This delightful dessert combines the rich, caramelized flavors of honey with a creamy filling, all nestled in a flaky crust. It’s not just a treat; it’s a conversation starter at any gathering. Whether you’re looking to impress your loved ones or simply indulge in a quick solution for a hectic day, this pie is sure to bring smiles and sweet satisfaction to your table.
Why You’ll Love This Burnt Honey Pie
This Burnt Honey Pie is a game-changer for busy lives. It’s incredibly easy to make, taking just about 50 minutes from start to finish. The taste? Oh, it’s a heavenly blend of sweet and slightly smoky flavors that dance on your palate. Plus, it’s a versatile dessert that can impress guests or satisfy your family’s sweet tooth. Trust me, once you try it, you’ll be hooked!
Ingredients for Burnt Honey Pie
Gathering the right ingredients is key to making a delicious Burnt Honey Pie. Here’s what you’ll need:
- 1 cup honey: The star of the show! Choose a high-quality honey for the best flavor. Local varieties often have unique tastes.
- 1 pie crust: You can use a store-bought crust for convenience or make your own for a personal touch. Either way, it’s the perfect vessel for our filling.
- 3 large eggs: These provide structure and richness to the pie. Fresh eggs will yield the best results.
- 1 cup heavy cream: This adds a luscious creaminess that balances the sweetness of the honey.
- 1 teaspoon vanilla extract: A splash of vanilla enhances the overall flavor, making it even more delightful.
- 1/4 teaspoon salt: Just a pinch to elevate the flavors and cut through the sweetness.
For those who want to experiment, consider adding a sprinkle of cinnamon or nutmeg for a warm spice note. Happy baking!
How to Make Burnt Honey Pie
Making Burnt Honey Pie is a delightful journey that’s easier than you might think. Follow these simple steps, and you’ll have a stunning dessert that will wow your family and friends.
Step 1: Preheat the Oven
First things first, preheat your oven to 350°F (175°C). Preheating is crucial because it ensures even baking. A hot oven helps the pie crust become golden and flaky while setting the filling perfectly. Trust me, you don’t want to skip this step!
Step 2: Prepare the Honey
Next, grab a saucepan and heat the honey over medium heat. Stir it gently until it transforms into a deep amber color. This caramelization process brings out the rich flavors that make Burnt Honey Pie so special. Just be careful not to let it burn too much; we want a lovely, smoky sweetness, not a charred mess!
Step 3: Mix the Filling
In a mixing bowl, whisk together the eggs, heavy cream, vanilla extract, and salt. This mixture should be smooth and creamy. The eggs provide structure, while the cream adds that luscious texture we all love. Make sure everything is well combined for the best results!
Step 4: Combine Honey and Filling
Now, it’s time to bring the burnt honey into the mix. Slowly pour the warm honey into the egg mixture while whisking continuously. This helps to temper the eggs, preventing them from scrambling. The result? A beautifully blended filling that’s ready to shine!
Step 5: Pour into Crust
Carefully pour the filling into your prepared pie crust. Whether you’ve opted for a store-bought crust or made your own, this step is crucial. A good crust holds everything together and adds that delightful crunch. Make sure it’s evenly distributed for a perfect bake!
Step 6: Bake the Pie
Pop the pie into your preheated oven and bake for 30-35 minutes. You’ll know it’s done when the filling is set but still has a slight jiggle in the center. This ensures a creamy texture that melts in your mouth. Keep an eye on it to avoid overbaking!
Step 7: Cool and Serve
Once baked, let the pie cool at room temperature for about 30 minutes. This cooling time allows the filling to firm up a bit more. Serve it as is, or add a dollop of whipped cream for an extra touch of indulgence. Enjoy every sweet bite!
Tips for Success
- Use a high-quality honey for the best flavor.
- Don’t rush the caramelization; patience is key for rich taste.
- Let the pie cool completely for easier slicing.
- Experiment with spices like cinnamon for a unique twist.
- Serve with fresh whipped cream or a scoop of vanilla ice cream.
Equipment Needed
- Mixing bowl: A large bowl for whisking ingredients. A sturdy pot can work in a pinch.
- Whisk: Essential for mixing. A fork can also do the job if you’re in a bind.
- Pie dish: Use a standard 9-inch pie dish. A tart pan can add a lovely touch.
- Saucepan: For heating the honey. A small skillet can be a good alternative.
Variations of Burnt Honey Pie
- Nutty Delight: Add 1/2 cup of chopped nuts like pecans or walnuts to the filling for a crunchy texture.
- Chocolate Twist: Mix in 1/2 cup of melted dark chocolate to the filling for a rich, decadent flavor.
- Fruit Infusion: Incorporate 1/2 cup of pureed fruit, such as raspberries or peaches, for a fruity twist.
- Gluten-Free Option: Use a gluten-free pie crust to make this dessert suitable for gluten-sensitive friends.
- Vegan Version: Substitute eggs with flaxseed meal and use coconut cream instead of heavy cream for a plant-based treat.
Serving Suggestions for Burnt Honey Pie
- Pair with a dollop of freshly whipped cream for added richness.
- Serve alongside a scoop of vanilla ice cream for a delightful contrast.
- Garnish with a sprinkle of sea salt to enhance the flavors.
- Accompany with a cup of herbal tea or coffee for a cozy touch.
FAQs about Burnt Honey Pie
Can I use a different type of honey for this pie?
Absolutely! While I recommend a high-quality honey for the best flavor, you can experiment with different varieties. Each type of honey brings its unique taste, so feel free to try wildflower, clover, or even orange blossom honey for a twist!
How do I know when the pie is done baking?
The key is to look for a filling that is set but still has a slight jiggle in the center. This ensures a creamy texture. If the edges start to brown too much, you can cover them with foil to prevent burning.
Can I make Burnt Honey Pie ahead of time?
Yes! This pie can be made a day in advance. Just let it cool completely, then cover it and store it in the refrigerator. It tastes even better the next day as the flavors meld together!
What can I serve with Burnt Honey Pie?
For a delightful pairing, serve it with whipped cream or a scoop of vanilla ice cream. A sprinkle of sea salt on top can also enhance the flavors beautifully. Enjoy it with a warm cup of tea or coffee for a cozy dessert experience!
Is Burnt Honey Pie suitable for special diets?
Yes! You can easily adapt this recipe for various dietary needs. Use a gluten-free crust for those avoiding gluten, or try a vegan version by substituting eggs and cream. The possibilities are endless!
Final Thoughts
Creating a Burnt Honey Pie is more than just baking; it’s about crafting a moment of joy. The rich, caramelized flavors and creamy filling come together to create a dessert that feels special, yet is surprisingly easy to make. Whether you’re sharing it with family after dinner or serving it at a gathering, this pie is sure to spark smiles and warm conversations. I love how it transforms an ordinary day into something extraordinary. So, roll up your sleeves, embrace the sweet adventure, and let this delightful pie bring a little magic to your table!


