


Table of Contents
- Make Your Own Homemade Blackberry Jam: A Simple Pleasure
- How This Blackberry Jam Recipe Works
- Ingredients for the Best Homemade Blackberry Jam (and Why They Matter)
- Step-by-Step Instructions: Your Guide to Perfect Blackberry Jam
- Expert Tips for Success with Homemade Blackberry Jam
- What to Serve with Your Homemade Blackberry Jam
- Storing and Reheating Homemade Blackberry Jam
- Homemade Blackberry Jam FAQ
Make Your Own Homemade Blackberry Jam: A Simple Pleasure
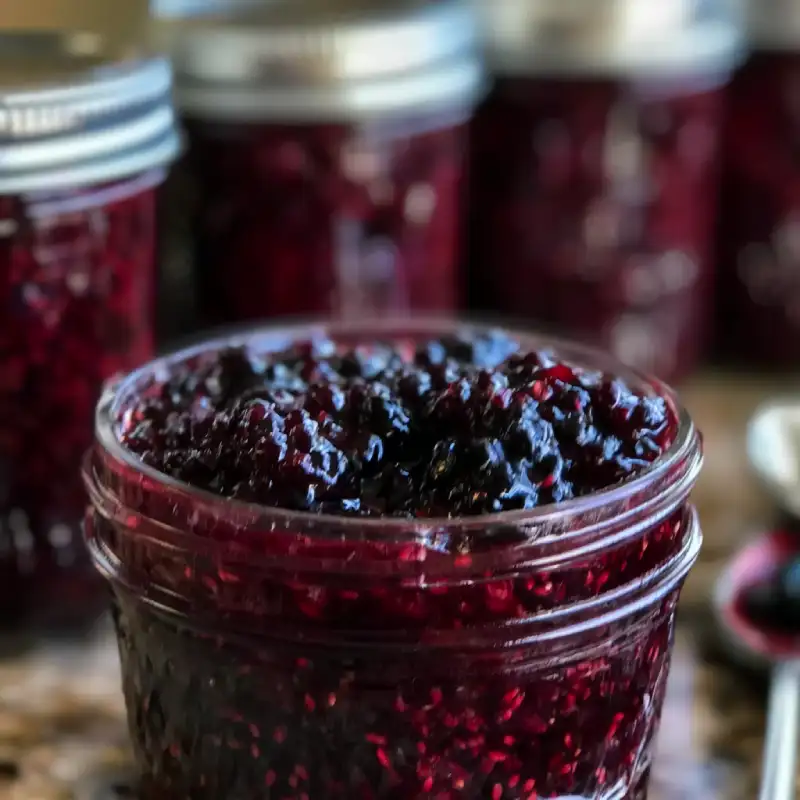
Imagine a burst of summer sunshine, perfectly sweet with a delightful tangy finish, spooned generously over a warm, buttery scone. That, my friends, is the magic of homemade blackberry jam. It’s a world away from the often overly sweet, one-note versions you find in stores. The depth of flavor, the vibrant color, the subtle textural nuances – these are things only a lovingly crafted homemade jam can deliver. For years, I chased that elusive perfect blackberry jam, tinkering with ratios, experimenting with cooking times, and occasionally ending up with something closer to blackberry soup or, conversely, a solid brick. But through trial, error, and a lot of happy taste tests, I’ve finally landed on a recipe that consistently produces jam with an impeccable set, robust fruit flavor, and that ideal balance of sweetness and tartness.
If you’re eager to explore more culinary delights, don’t forget to See more easy recipes right here on my blog!
How This Blackberry Jam Recipe Works
- Achieving the ideal set without over-gelling: This recipe carefully balances the natural pectin in the berries with a touch of added pectin (optional but recommended for beginners) and lemon juice, ensuring a firm yet spreadable consistency without becoming overly stiff or gummy.
- Maximizing fresh blackberry flavor: We utilize ripe, seasonal blackberries and a strategic cooking process to concentrate their natural essence, resulting in a jam that truly tastes of fresh summer berries.
- Balancing sweetness and tartness for a vibrant taste: The sugar content is calibrated to complement, not overwhelm, the blackberries’ inherent tartness, creating a bright and lively flavor profile that sings on your palate.
- Simple process, great results: While jam-making might seem intimidating, this guide breaks it down into manageable steps, empowering even novice preservers to achieve professional-quality results.
Ingredients for the Best Homemade Blackberry Jam (and Why They Matter)
Here is what you need and why:
Fresh Blackberries: These are the stars of the show! Selecting ripe, plump berries is crucial for the best flavor and natural pectin content. Look for berries that are deep in color, soft but not mushy, and sweet-smelling. Avoid any green or hard berries, as they lack flavor and natural pectin.
Granulated Sugar: Beyond just sweetness, sugar plays several vital roles in jam-making. It acts as a preservative, inhibiting microbial growth, and is essential for achieving the proper gel set by interacting with pectin. It also enhances the overall flavor and texture of the jam.
Lemon Juice: Don’t skip the lemon juice! It’s absolutely essential for two main reasons. Firstly, it lowers the pH of the mixture, which is critical for activating the pectin and initiating the gelling process. Secondly, it brightens and balances the jam’s flavor, adding a pleasant tartness that prevents it from being cloyingly sweet.
Pectin (Optional, but Recommended for Beginners): While blackberries do contain some natural pectin, certain varieties or less ripe berries might not have enough to guarantee a firm set. Using a small amount of powdered fruit pectin (like Sure-Jell or Ball brand) is a fantastic insurance policy, especially for beginners, ensuring your jam sets beautifully every time. If you become more confident, you can try making it without, but be prepared for a slightly softer set.
Substitutions: You can adjust the sugar slightly to your preference, but remember too little sugar might affect the set and preservation. As for pectin, there are different types (liquid, powdered, low-sugar). This recipe assumes regular powdered pectin that requires full sugar. If using low-sugar pectin, follow its specific package instructions regarding sugar amounts.
Step-by-Step Instructions: Your Guide to Perfect Blackberry Jam
Follow these step-by-step photos:
1. Preparation
Start by washing your fresh blackberries gently under cool running water. Pick through them, removing any stems, leaves, or bruised berries. It’s also crucial to sterilize your canning jars and lids. You can do this by washing them in hot, soapy water, rinsing well, and then either boiling them in a large pot for 10 minutes or running them through a dishwasher on a hot sanitize cycle. Keep them hot until ready to fill. Gather all your equipment: a large, heavy-bottomed pot, a potato masher or immersion blender (optional), a long-handled spoon, a ladle, a canning funnel, and a candy thermometer.
2. Cooking the Berries
Place the washed blackberries into your large, heavy-bottomed pot. Over medium heat, begin to cook the berries, gently mashing them with a potato masher or the back of your spoon. This helps to break them down and release their juices. Continue cooking, stirring frequently, for about 5-10 minutes, until the berries are soft and swimming in their own liquid. If you prefer a seedless jam, this is the stage to press the cooked berries through a fine-mesh sieve or a food mill to remove the seeds. Return the seedless pulp to the pot.
3. Adding Sugar and Lemon Juice
Once the berries have softened and released their juices, stir in the granulated sugar and the fresh lemon juice. If you are using powdered pectin, sprinkle it over the fruit mixture and stir well to dissolve it before adding the sugar and lemon juice. Continue stirring over medium-high heat until the sugar is completely dissolved. Ensure there are no grainy bits at the bottom of the pot.
4. Cooking to Temperature/Set Point
Bring the jam mixture to a rolling boil that cannot be stirred down. This is crucial for activating the pectin. Maintain this vigorous boil, stirring constantly to prevent scorching. Attach your candy thermometer to the side of the pot, ensuring the tip doesn’t touch the bottom. Continue boiling, stirring regularly, until the jam reaches 220°F (104°C) at sea level. This temperature indicates the proper sugar concentration for setting. Alternatively, you can use the cold plate method (see Expert Tips below) to test for set.
5. Skimming Foam and Jarring
Once the jam reaches its set point, remove it from the heat. A layer of foam will likely have formed on the surface. Skim this foam off using a metal spoon. While it doesn’t affect the taste, it can make your jam look cloudy. Ladle the hot jam carefully into your prepared, hot sterilized jars, leaving about 1/4 inch of headspace from the rim. Wipe the rims clean with a damp cloth, center the hot lids, and screw on the bands finger-tight. Process the jars in a boiling water bath canner for 10 minutes (adjusting for altitude). After processing, carefully remove the jars and place them on a towel-lined counter to cool completely. You’ll hear the satisfying ‘ping’ as the lids seal.
Expert Tips for Success with Homemade Blackberry Jam
- Testing for Set: The cold plate method is your best friend! Place a small plate in the freezer before you start cooking. When you think the jam is ready, spoon a teaspoon onto the cold plate. Wait 30 seconds, then push the jam with your finger. If it wrinkles and holds its shape, it’s set. If it’s still runny, continue cooking for a few more minutes and retest.
- Using a Candy Thermometer: For consistent, reliable results, invest in a good quality candy thermometer. It takes the guesswork out of determining when your jam has reached the crucial gelling temperature, preventing both undercooked (runny) and overcooked (stiff, caramelized) jam.
- Sterilizing Jars and Lids: Proper sterilization isn’t just about hygiene; it creates a vacuum seal that allows for long-term, shelf-stable storage. Always use canning jars designed for the purpose and new lids for each batch to ensure a proper seal. You can find excellent detailed guides on proper canning techniques from reputable sources like Food Network.
- Avoiding Common Jam-Making Mistakes: Overcooking can lead to a dark, overly stiff jam with a caramelized flavor. Undercooking results in a runny jam that won’t set. Crystallization often occurs when there’s too much sugar, or the jam is cooked too slowly. Stick to the recipe’s ratios and use a thermometer for best results.
- Adjusting Sweetness: While the recipe provides an optimal sweetness level, feel free to slightly adjust the sugar to your taste. However, be mindful that reducing sugar too much can impact the jam’s texture and shelf life, especially if not using a low-sugar pectin.
What to Serve with Your Homemade Blackberry Jam
Your beautiful homemade blackberry jam deserves to be showcased! Of course, it’s heavenly simply spread on classic pairings like crispy toast, warm, fluffy scones, or decadent buttermilk biscuits. But don’t stop there! Stir a dollop into your morning yogurt or oatmeal for a touch of fruit, swirl it into pancake or waffle batter, or thin it slightly with a splash of water and use it as a glaze for roasted chicken or pork. For desserts, it makes an exquisite filling for thumbprint cookies, a vibrant topping for vanilla ice cream or cheesecake, or a delicious layer in a simple sponge cake. The possibilities are truly endless with this liquid gold.
Storing and Reheating Homemade Blackberry Jam
Once properly processed in a boiling water bath, your sealed jars of homemade blackberry jam are shelf-stable and can be stored in a cool, dark place (like a pantry) for up to a year. This method ensures a vacuum seal that keeps the jam fresh. If you opt not to water-bath can, the jam must be stored in the refrigerator and will be good for about 2-3 weeks.
Once you open a jar, always store it in the refrigerator. An opened jar typically remains fresh for several weeks to a month. If you notice any signs of mold, unusual odors, or changes in color or texture, it’s best to discard the jam to ensure safety.
Troubleshooting Storage Issues: The most common issue is mold formation, which indicates either improper sterilization, inadequate processing, or an imperfect seal. Ensure your jars are meticulously clean, your lids are new, and your processing times are accurate. If the jam isn’t setting correctly, it might be an issue with pectin activation (not enough acid or not reaching the proper temperature) or incorrect sugar ratios.
Homemade Blackberry Jam FAQ
Can I use frozen blackberries?
Why didn’t my jam set?
How long does homemade jam last?
Can I reduce the sugar content?
Do I really need the lemon juice?
Homemade Blackberry Jam
- Total Time: 56 minute
- Yield: 6-8 half-pint jars 1x
Description
Unlock the vibrant flavors of summer with this easy-to-follow Homemade Blackberry Jam recipe. Enjoy a perfectly set, deliciously sweet, and tangy jam that’s far superior to store-bought varieties.
Ingredients
- 8 cups fresh blackberries (about 2.5 lbs)
- 6 cups granulated sugar
- 1/4 cup fresh lemon juice (from 1–2 lemons)
- 1 packet (1.75 oz) powdered fruit pectin (optional, but recommended for beginners)
Instructions
- Preparation: Wash blackberries, removing stems. Sterilize canning jars and lids by boiling for 10 minutes; keep hot. Gather equipment.
- Cook Berries: Place blackberries in a large, heavy-bottomed pot. Cook over medium heat, mashing gently, for 5-10 minutes until soft and juicy. (Optional: press through a sieve for seedless jam).
- Add Sugar and Lemon Juice: Stir in powdered pectin (if using) until dissolved, then add granulated sugar and lemon juice. Bring to a rolling boil over medium-high heat, stirring constantly until sugar is dissolved.
- Cook to Set Point: Continue boiling vigorously, stirring frequently, until the jam reaches 220°F (104°C) on a candy thermometer, or passes the cold plate test.
- Skim and Jar: Remove from heat and skim any foam from the surface. Ladle hot jam into hot, sterilized jars, leaving 1/4 inch headspace. Wipe rims, center lids, and screw bands finger-tight.
- Process: Process jars in a boiling water bath canner for 10 minutes (adjust for altitude). Carefully remove and cool on a towel-lined counter until sealed.
- Prep Time: 20 mins
- Cook Time: 30-40 mins