


Table of Contents
- Whip Up the Best Strawberry Milkshake at Home!
- Why This Strawberry Milkshake Recipe Works
- Essential Ingredients & Smart Substitutions
- Your Step-by-Step Guide to a Perfect Strawberry Milkshake
- Expert Tips for Milkshake Success
- What to Serve with Your Strawberry Milkshake
- Storing and Enjoying Later (If There’s Any Left!)
- Strawberry Milkshake FAQs
Whip Up the Best Strawberry Milkshake at Home!
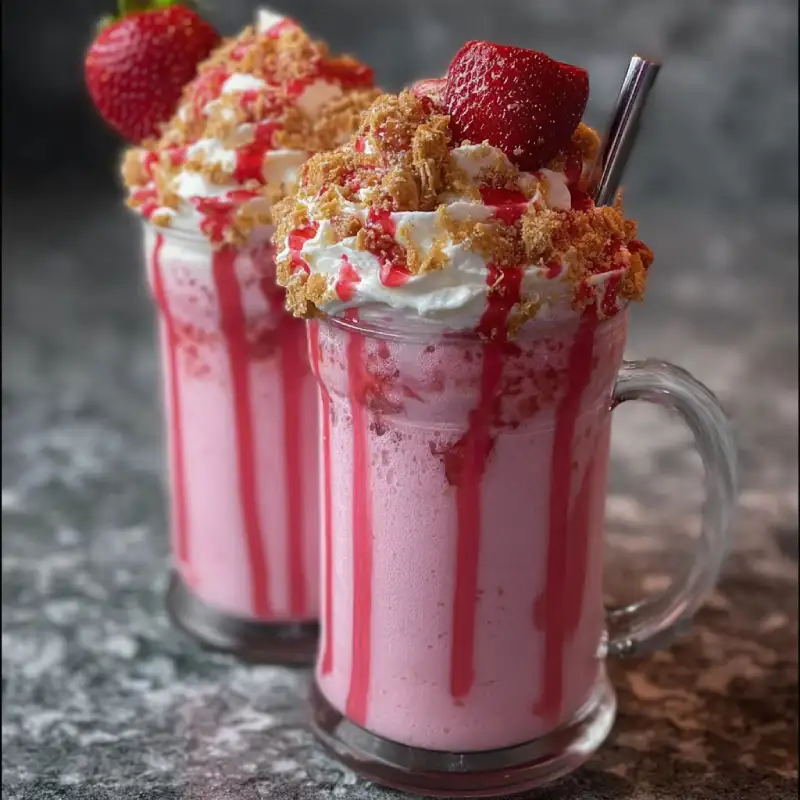
There are few things as utterly delightful and refreshing as a perfectly blended, thick, and creamy strawberry milkshake. That first sip, a blast of sweet, tangy strawberry swirled with icy smooth richness, is pure bliss. It’s the kind of treat that instantly transports you back to simpler times, evoking memories of diners, summer days, and pure, unadulterated joy. Forget those thin, watery store-bought versions filled with artificial flavors. We’re talking about a milkshake so good, so vibrant in flavor and luxuriously thick in texture, it’ll make you wonder why you ever bought one off a menu. If you’re looking for more easy, delicious recipes like this, be sure to See more easy recipes right here!
Why This Homemade Shake Beats Store-Bought Every Time
It’s simple: control. When you make your own strawberry milkshake, you control the quality of the ingredients, the sweetness level, and crucially, the thickness. No more sad, overly sweet concoctions that taste more like chemical berry than real fruit. Here, every sip is bursting with genuine strawberry goodness.
My Go-To Refreshing Treat
Whether it’s a scorching summer afternoon or you just need a pick-me-up, this strawberry milkshake is my ultimate comfort in a glass. It’s quick, satisfying, and requires very little fuss for such a spectacular reward.
Why This Strawberry Milkshake Recipe Works
- Achieving Creamy Thickness: The Right Ratio: The magic of a truly great milkshake lies in its balance. We’ve perfected the ratio of frozen fruit, ice cream, and milk to give you that spoon-standing-up thickness without being overly dense.
- Bursting with Fresh Strawberry Flavor: No Artificial Taste: By leveraging the power of frozen strawberries, we lock in their natural sweetness and vibrant taste. This recipe celebrates the fruit, allowing its natural sugars and slight tartness to shine through, unmarred by artificial additives.
- Perfectly Sweetened: Balance is Key: We start with naturally sweet ingredients, and any additional sweetener is kept minimal and optional, allowing you to tailor it exactly to your preference for a truly custom treat.
- Quick and Easy: Minimal Effort, Maximum Reward: From start to finish, you’re looking at mere minutes. It’s the ultimate hassle-free dessert or snack, ideal for those moments when a craving strikes and you need satisfaction FAST.
Essential Ingredients & Smart Substitutions
Here is what you need and why:
Frozen Strawberries: Fresh vs. Frozen – Why It Matters: This is your secret weapon for the perfect strawberry milkshake. Frozen strawberries are picked and flash-frozen at their peak ripeness, locking in maximum flavor and sugar content. More importantly, they contribute to the milkshake’s thickness and chill without diluting the flavor like ice cubes would. While you can use fresh, you’ll need to add ice, which can make for a less intense flavor. For an exceptional milkshake, frozen is the unequivocal choice!
Vanilla Ice Cream: Choosing for Creaminess and Flavor: A high-quality vanilla ice cream is the backbone of any great milkshake. Look for one with a good fat content and pure vanilla extract for that rich, creamy texture and complementary flavor. It provides both sweetness and crucial body. You could experimenting with strawberry ice cream for an ultimate strawberry blast, but vanilla allows the natural fruit flavor to truly shine.
Milk: The Best Type for Blending and Texture: Whole milk is my top recommendation for the ultimate creamy consistency. Its fat content helps emulsify everything beautifully. However, 2% milk works just fine if that’s what you have on hand. For dairy-free options, unsweetened almond milk or oat milk are fantastic alternatives, just be mindful that they might slightly alter the final texture and sweetness.
Sweetener (Optional): Adjusting to Your Taste: Depending on the sweetness of your strawberries and ice cream, you might not need any added sugar. If you prefer a sweeter shake, a tablespoon or two of sugar, maple syrup, or honey can be added. Taste as you go!
Vanilla Extract: A Flavor Booster: Just a tiny splash of pure vanilla extract works wonders to round out the flavors and add an extra layer of warmth and complexity. It enhances the strawberry without overpowering it.
Your Step-by-Step Guide to a Perfect Strawberry Milkshake
Follow these step-by-step photos:
1. Gather Your Tools and Ingredients
Before you begin, ensure your blender is ready and all your ingredients are measured out. You’ll need a powerful blender to pulverize those frozen strawberries into a smooth consistency. Having everything at your fingertips makes the process seamless and quick.
2. The Blending Process: Order Matters
Add the milk to your blender first, followed by the frozen strawberries, and then scoop in the vanilla ice cream. This order helps the blender blades catch the liquid first, creating a vortex that pulls the solids down, leading to smoother blending. Start on a low speed, then gradually increase to high.
3. Achieving Your Preferred Consistency
Blend until smooth and creamy. If the mixture is too thick and the blender is struggling, add more milk, one tablespoon at a time, until it blends easily to your desired consistency. For a thicker shake, use slightly less milk. For a thinner one, add a bit more. Resist the urge to add too much milk at once!
4. Serving Immediately for Best Experience
As soon as your strawberry milkshake reaches that perfect, pourable-yet-thick consistency, pour it into chilled glasses. Garnish with a fresh strawberry, a dollop of whipped cream, or sprinkles if you’re feeling fancy. Milkshakes are best enjoyed right away!
Expert Tips for Milkshake Success
- Chill Your Glassware: Pop your serving glasses in the freezer for 10-15 minutes before blending. This helps keep your milkshake colder for longer, preserving that delightful thick texture.
- Don’t Overblend: Avoid Thinning: While you want it smooth, excessive blending can generate heat and melt the ice cream, leading to a thinner milkshake. Blend just until combined and smooth.
- Adjusting Sweetness to Taste: Always taste a small spoonful before serving. If your strawberries weren’t very sweet, or if you simply prefer a sweeter shake, add a little extra sugar, honey, or maple syrup and give it another quick blend.
- Adding Flavor Boosters (Optional): For an extra layer of flavor, consider adding a tiny pinch of salt (it surprisingly enhances sweetness!), a splash of almond extract, or even a tablespoon of cream cheese for a cheesecake-like twist. For a chocolate version, try a tablespoon of cocoa powder! For more inspiration, check out this great article from Food Network.
What to Serve with Your Strawberry Milkshake
Classic Pairings: Burgers and Fries
There’s a reason diners pair milkshakes with comfort food! The cool, sweet creaminess of a strawberry milkshake is the perfect counterpoint to a salty, savory burger and crispy fries. It’s an iconic combination for a reason.
Sweet Treats: Cookies and Brownies
Lean into the indulgence! A thick milkshake is heavenly alongside warm chocolate chip cookies, fudgy brownies, or even a slice of pie. It’s the ultimate dessert pairing.
Light Snacks: Fruit and Granola
For a lighter or breakfast-appropriate pairing, enjoy your milkshake with a bowl of fresh berries and granola. It makes for a substantial yet refreshing start to your day or a delightful afternoon snack.
Storing and Enjoying Later (If There’s Any Left!)
Short-Term Storage (Refrigeration)
A fresh strawberry milkshake is always best enjoyed immediately. However, if you have a little left over, you can store it in an airtight container in the refrigerator for up to an hour. It will likely separate and thin out, so don’t expect the same thick consistency.
Re-Thickening Tips
If you do need to re-enjoy a stored milkshake, give it a good stir. For best results, pour it back into the blender with a small scoop of vanilla ice cream or a few more frozen strawberries and re-blend for a few seconds to restore some of its original creaminess and thickness.
Frequently Asked Questions
Can I use fresh strawberries instead of frozen?
What kind of milk is best for milkshakes?
How can I make my milkshake thicker?
Can I make this dairy-free?
Delicious Strawberry Milkshake
- Total Time: 5 minutes
- Yield: 2 servings 1x
Description
Learn how to make a delicious and incredibly creamy strawberry milkshake at home. This recipe guarantees phenomenal flavor and perfect thickness every time.
Ingredients
- 1 cup (approx. 140g) frozen strawberries
- 1 cup (240ml) whole milk (or 2% / dairy-free alternative)
- 2 cups (approx. 200g) vanilla ice cream
- 1–2 tablespoons granulated sugar, maple syrup, or honey (optional, to taste)
- 1/4 teaspoon pure vanilla extract (optional)
Instructions
- 1. Gather all your ingredients and ensure your blender is clean and ready. For best results, chill your serving glasses in the freezer for 10-15 minutes.
- 2. Add the milk to the blender first, followed by the frozen strawberries, then the vanilla ice cream. If using, add the optional sweetener and vanilla extract.
- 3. Secure the lid and start blending on a low speed, gradually increasing to high. Blend until the mixture is completely smooth, thick, and creamy, scraping down the sides with a spatula if necessary.
- 4. If the milkshake is too thick for your blender, add more milk, one tablespoon at a time, until it blends smoothly to your desired consistency. Do not overblend.
- 5. Immediately pour the freshly blended strawberry milkshake into your chilled glasses. Serve plain or garnish with whipped cream and a fresh strawberry. Enjoy without delay!
- Prep Time: 5 mins
- Cook Time: 0 mins