


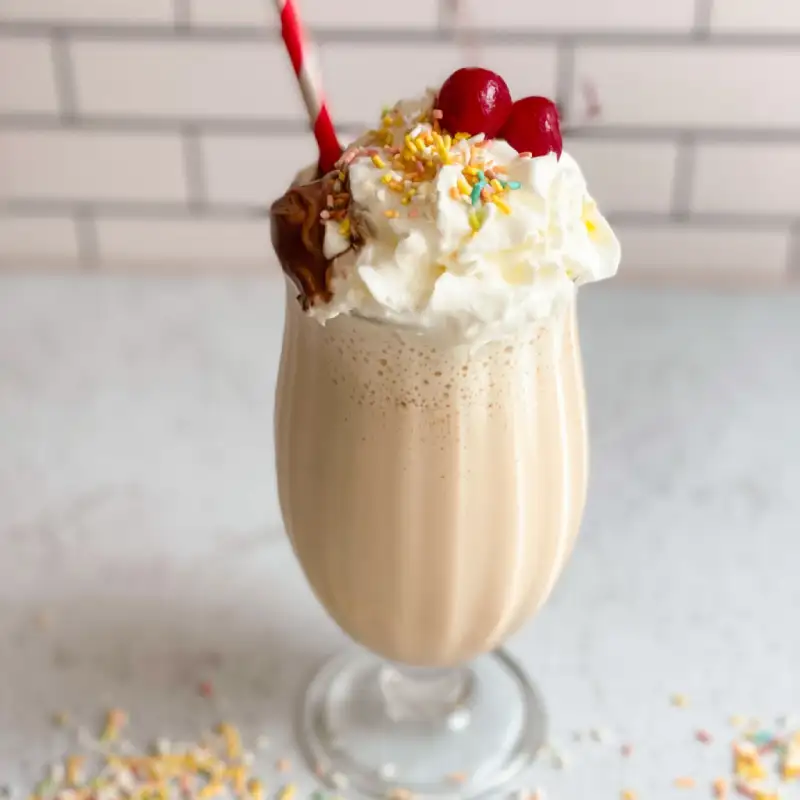
Fuel Your Day: The Quick & Delicious Protein Milkshake
Imagine a beverage that’s creamy, satisfyingly sweet, and packed with everything your body needs to power through your day, sustain a workout, or recover like a champion. This isn’t just any smoothie; this is the ultimate protein milkshake. Forget gritty textures and bland flavors; my recipe delivers a velvety smooth, deliciously balanced drink that will make you question how something so good can be so good for you! It’s the kind of treat that feels indulgent but fuels your body right. And if you’re looking for more amazing, easy-to-make recipes like this, see more easy recipes here.
My personal journey to a perfect protein treat started with a lot of trial and error. I’ve blended more protein shakes than I care to admit, ranging from watery disappointments to thick, unappetizing sludge. But through persistence and a dash of culinary curiosity, I cracked the code. This protein milkshake recipe is the culmination of those experiments, designed to be your new go-to for a quick, delicious, and incredibly nourishing boost.
Why This Protein Milkshake Hits Different
- Unrivaled Creamy Texture: We achieve a luxurious mouthfeel without it feeling overly heavy or thick, perfect for sipping.
- A Symphony of Flavors: The sweetness is perfectly balanced, naturally satisfying cravings without an overwhelming sugar rush.
- Infinitely Customizable: This isn’t a one-and-done recipe; it’s a foundation for endless delicious variations to suit your mood and pantry.
Ingredients & Smart Substitutions for Your Protein Milkshake
Here is what you need and why:
Protein Powder: This is the star of your protein milkshake, providing the muscle-building and satiety benefits.
Whey Protein: Digests quickly, making it ideal post-workout. It tends to create a smoother texture.
Plant-based Protein (e.g., pea, rice, or a blend): Excellent for those avoiding dairy. Be aware that some plant-based proteins can be a little grittier; choose a high-quality, finely milled powder for best results. Consider unflavored or vanilla to maintain control over the overall taste profile. My personal favorite for smoothies is this Garden of Life Raw Organic Protein.
Liquid Base: The liquid base impacts both the consistency and flavor of your milkshake.
Dairy Milk (whole or skim): Adds richness and creaminess, plus extra protein and calcium.
Nut Milks (almond, cashew, oat): Great dairy-free options. Oat milk often lends the creamiest texture, while almond milk is lighter.
Water: The leanest option, best if you’re looking to minimize calories, but results in a thinner milkshake.
Frozen Fruit: This is the secret to natural sweetness, fantastic flavor, and incredible thickness without needing ice.
Frozen Banana: A superstar for creaminess and sweetness. It’s truly transformative.
Frozen Berries (strawberries, blueberries, raspberries): Add vibrant flavor and antioxidants.
Frozen Mango or Pineapple: Offer tropical notes and a lovely smooth texture.
Healthy Fats: Elevate creaminess and add satiety, keeping you fuller for longer.
Avocado: A small wedge (a quarter or half) makes your protein milkshake incredibly creamy and adds healthy monounsaturated fats without altering the taste significantly.
Nut Butter (almond, peanut, cashew): Provides protein, healthy fats, and a delicious nutty flavor. Start with a tablespoon and adjust to taste.
Sweeteners (Optional): Your choice of protein powder and fruit might be enough, but sometimes a touch more sweetness is desired.
Maple Syrup or Honey: Natural liquid sweeteners that blend in seamlessly.
Dates: Add natural sweetness and fiber; make sure to pit them!
Stevia or Erythritol: Calorie-free options for those managing sugar intake.
Flavor Boosts: Customize your milkshake to new heights!
Vanilla Extract: Enhances almost any flavor profile.
Cinnamon or Nutmeg: Adds warmth and a subtle spice.
Cocoa Powder (unsweetened): For a chocolatey indulgence, turn your delicious smoothie into a chocolate protein milkshake.
Espresso Powder: A hint of coffee can deepen chocolate flavors or add a wake-up kick.
Your Step-by-Step Guide to the Perfect Protein Milkshake
Follow these step-by-step photos:
1. Gather and Measure Your Ingredients
Before you even think about hitting that blender button, take a moment to collect and measure all your ingredients. This ensures you won’t be scrambling mid-blend and helps guarantee consistent results every time. Have your protein powder, liquid base, frozen fruit, healthy fats, and any optional sweeteners or flavor boosts ready to go. Accuracy here sets the stage for success!
2. Layering for Optimal Blending
The order in which you add ingredients to your blender matters! For the smoothest blend, always start with your liquids at the bottom. This allows the blades to move freely. Next, add your protein powder, followed by softer ingredients like nut butters or avocado. Finally, top with your frozen fruit. This layering technique helps prevent air pockets and ensures everything gets incorporated evenly.
3. Blending to Creamy Perfection
Secure the lid tightly on your blender. Start on a low speed to break down the frozen ingredients, then gradually increase to high. Blend until the mixture is completely smooth and creamy, with no visible chunks of fruit or clumps of protein powder. This typically takes 30-60 seconds, depending on your blender’s power. Scrape down the sides if necessary to ensure everything is fully incorporated into your protein milkshake.
4. Adjusting Consistency and Taste
Once blended, assess your protein milkshake. Is it too thick? Add a splash more liquid (milk, water, or nut milk). Is it too thin? Add a few more pieces of frozen fruit or half an avocado. Taste your milkshake. Does it need more sweetness? A bit more flavor? Now is the time to add a touch more maple syrup, a pinch of cinnamon, or another small scoop of protein powder if you desire. Blend again briefly to incorporate any adjustments.
Expert Tips for Protein Milkshake Success
- The Power of Pre-Portioned Ingredients: Prepare individual Ziploc bags or containers with your fixed amounts of frozen fruit, protein powder, and optional add-ins. Freeze them. In the morning, just dump the contents into your blender with your liquid and blend – ultimate efficiency!
- Achieving the Ideal Thickness: For a thicker milkshake, use less liquid or more frozen fruit/avocado. For a thinner consistency, add more liquid incrementally. Remember, frozen banana is your best friend for a rich, thick texture.
- Troubleshooting Gritty Texture: If your protein milkshake comes out gritty, it’s often due to the protein powder or insufficient blending time. Use a high-quality, finely milled protein powder, and blend on high for a full minute or until completely smooth. Adding a healthy fat like avocado or nut butter can also help mask any lingering grittiness.
- Flavor Combinations to Try: Don’t limit yourself! Experiment with these combos: Chocolate Peanut Butter (cocoa powder + peanut butter), Strawberry Banana (frozen strawberries + banana), Tropical Delight (mango + pineapple + coconut milk), or even a refreshing Mint Chocolate Chip (cocoa powder + mint extract). The possibilities for your next delicious protein milkshake are endless!
What to Serve With Your Protein Milkshake
This versatile protein milkshake can stand alone, but it also pairs beautifully with other elements to create a complete meal or satisfying snack.
- Post-Workout Companions: A handful of nuts for extra healthy fats and crunch, or a small bowl of Greek yogurt for added protein.
- Breakfast Additions for a Complete Meal: Enjoy your milkshake alongside a slice of whole-grain toast with avocado, or a small bowl of oatmeal topped with berries and seeds.
- Healthy Snack Pairings: A few rice cakes with a smear of avocado, or some carrot sticks with hummus. For a sweet treat, a couple of squares of dark chocolate can be a delightful complement.
Storing & Reheating Your Protein Milkshake
A fresh protein milkshake is always best, but sometimes you need to plan ahead!
- Best Practices for Immediate Consumption: Enjoy your delicious protein milkshake right after blending for optimal taste, texture, and nutrient absorption.
- Short-Term Storage Tips: If you have leftovers or want to prepare it a few hours in advance, pour your protein milkshake into an airtight container or a jar with a tight lid. Store it in the refrigerator for up to 24 hours. The consistency might separate slightly, but a quick shake or re-blend will bring it back together.
- Re-blending for Freshness: If storing for more than an hour or two, your milkshake might thicken or separate. A quick re-blend for 10-15 seconds will usually restore it to its smooth, creamy glory, ensuring every sip is as perfect as the first.
Frequently Asked Questions
Can I use fresh fruit instead of frozen?
What’s the best protein powder for a milkshake?
How can I make my milkshake thicker/thinner?
Can I make this dairy-free?
Ultimate Protein Milkshake
- Total Time: 5 minutes
- Yield: 1 serving 1x
Description
This isn’t just a shake; it’s a creamy, satisfying, and utterly delicious protein-packed milkshake designed to fuel your day or recover like a champion. Say goodbye to gritty textures and bland flavors, and hello to your new favorite healthy indulgence!
Ingredients
- 1 scoop (approx. 25-30g) protein powder (whey or plant-based, vanilla or unflavored
- 1 cup liquid base (dairy milk, almond milk, oat milk, or water)
- ½–1 frozen banana OR 1 cup frozen berries (strawberries, blueberries)
- ¼ ripe avocado OR 1 tbsp preferred nut butter (almond, peanut, cashew)
- Optional: ½ tsp vanilla extract, dash of cinnamon, 1 tbsp unsweetened cocoa powder, 1 tsp maple syrup or honey for extra sweetness
Instructions
- Add your liquid base to the blender first.
- Next, add your protein powder, healthy fat (avocado or nut butter), and any optional sweeteners or flavor boosts.
- Top with your frozen fruit.
- Secure the lid and blend on low, gradually increasing to high until completely smooth and creamy, about 30-60 seconds.
- Pour into a glass and enjoy immediately. If too thick, add a splash more liquid; if too thin, add more frozen fruit or avocado and re-blend.
- Prep Time: 5 mins
- Cook Time: 0 mins